Copper Be Gone: The Chemistry Behind PCB Etching
For a lot of reasons, home etching of PCBs is somewhat of a dying art. The main reason is the rise of quick-turn PCB fabrication services, of course; when you can send your Gerbers off and receive back a box with a dozen or so professionally made PCBs for a couple of bucks, why would you want to mess with etching your own?
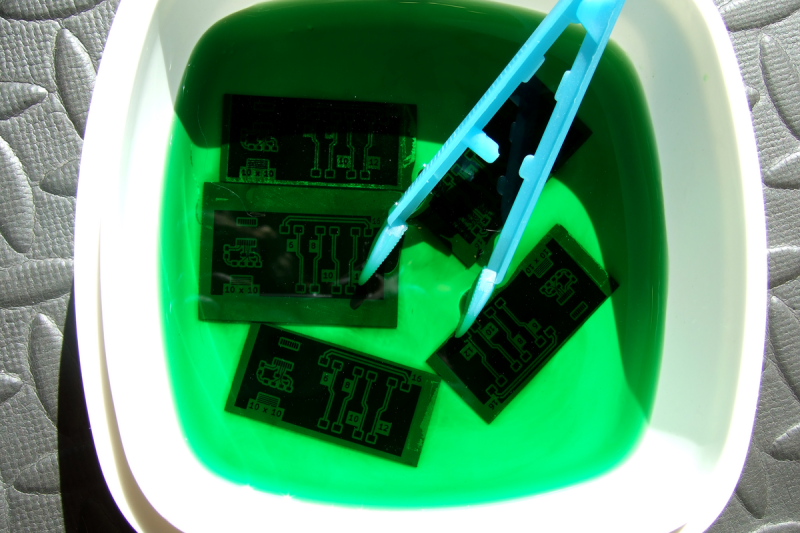
Convenience and cost aside, there are a ton of valid reasons to spin up your own boards, ranging from not having to wait for shipping to just wanting to control the process yourself. Whichever camp you’re in, though, it pays to know what’s going on when your plain copper-clad board, adorned with your precious artwork, slips into the etching tank and becomes a printed circuit board. What exactly is going on in there to remove the copper? And how does the etching method affect the final product? Let’s take a look at a few of the more popular etching methods to understand the chemistry behind your boards.
Wet, Dry, or In Between?
At the end of the day, PCB etching is all about removing copper from a board in as controlled a fashion as possible. PCB etching methods generally fall into one of two broad categories: wet and dry processes. For the home gamer, dry processes would include methods like milling out traces with a CNC router, or even the tried and true method of scratching out traces using a razor blade. On a commercial level, dry etching generally refers to methods like laser etching, where a high-power laser is used to ablate copper from the underlying substrate to create traces, or plasma etching, which uses RF energy to generate a reactive plasma from an etching gas.
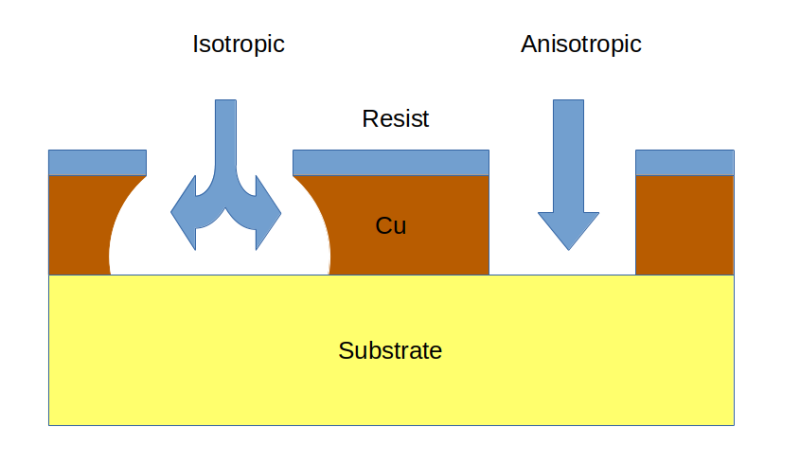
With the notable exception of scratching out traces with an X-Acto, these dry etching methods all have the disadvantage of needing specialized machines of some sort. What they lack in simplicity, though, they make up for in the direction of etching and the fine control they achieve in copper removal. Dry etching methods are all anisotropic processes; that is, they direct copper removal in a single direction and avoid the risk of undercutting. Wet methods, all of which rely on chemical reactions to get metallic copper into an aqueous solution, are isotropic processes, meaning that they proceed more or less evenly in all directions. This can become a problem; if the process is not tightly controlled, the etching reactions can extend underneath the resist layer masking off areas of the future traces of the PCB, potentially creating high-resistance narrowing of traces or even open circuits.
Ferric Chloride
If you’ve done any PCB etching at home, chances are pretty good that you’ve at least tried the old standby, ferric chloride. It’s cheap and easy, and has a lot of advantages over other wet etching chemistries, not least of which is that you can make an almost unlimited supply of the stuff using nothing but a handful of nails and some chemicals you can easily source at a pool store and a pharmacy:
Also known as iron (III) chloride (FeCl3), ferric chloride quickly and effectively dissolves metallic copper, but what does the reaction look like? The overall reaction is pretty straightforward:

When ferric chloride comes in contact with metallic copper, one of its chlorine atoms is transferred to a copper atom, making copper (II) chloride, or cupric chloride, which is soluble in water. This allows the copper that was once bonded to the PCB substrate to be rinsed away. It seems simple enough, but that overall reaction hides a lot of chemical complexity, and the details are worth digging into a bit.
First, a bit about nomenclature. Compounds with metal cations (positively charged species) have traditionally used different suffixes to denote their oxidation state, or the charge of the atom. The “-ic” suffix denotes the higher oxidation state, while “-ous” refers to the lower oxidation state. The suffix is tacked onto the Latin prefix for the metal, yielding names such as “ferric”, referring to iron with a 3+ oxidation state, or “ferrous”, which is a 2+ state. This convention stretches back almost to the days of alchemy, and while it’s still in common use, the standard nomenclature is now to indicate the oxidation state with parenthetical Roman numerals in compound names, iron (III) chloride (FeCl3) and iron (II) chloride (FeCl2).
The nomenclature sets the stage for understanding the underlying reactions that make ferric chloride good at etching copper. In solution, ferric chloride rapidly dissociates into iron (III) and chloride ions:

Likewise, water dissociates into hydrogen and hydroxyl ions:

This results in an abundance of iron (III) ions with a strong positive charge in an environment with a lot of negatively charged hydroxyl ions. They get together and form iron (III) hydroxide, which is an insoluble compound that precipitates out of solution:

Pulling all those hydroxyl ions out of solution leaves behind a bunch of hydrogen ions, which has the effect of making the solution more acidic (decreasing its pH). This creates an environment where the iron (III) ions from equation 1 gain an electron (reduction) from the solid copper cladding on the PCB, resulting in oxidation of the copper to copper (II) ions in solution:

The copper (II) and iron (II) ions in solution are then free to glom onto all those highly electronegative chloride ions from equation 1, forming the copper (II) chloride and iron (II) chloride products on the right side of the overall equation, and leaving behind copper-free areas on the newborn PCB. The etching solution eventually becomes saturated with copper (II) oxide, which starts precipitating out of the solution as a blue-green solid. It takes a while to get there, though; depending on the strength of the etchant when fresh, you can expect it to hold up to 50 grams per liter of copper metal before it can hold no more.
Persulfates
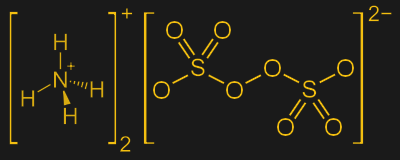
Persulfates are usually available as salts of either sodium or ammonium, or sometimes even potassium. These positively charged species are known as counterions; when dissolved in water, persulfate salts rapidly dissociate into free persulfate ions and their counterions:
![\bf \left[NH_{4}\right]^{+}_{2}\left[S_{2}O_{8}\right]^{2-} \rightleftharpoons 2 \left[NH_{4}\right]^{+} + \left[S_{2}O_{8}\right]^{2-}](https://s0.wp.com/latex.php?latex=%5Cbf+%5Cleft%5BNH_%7B4%7D%5Cright%5D%5E%7B%2B%7D_%7B2%7D%5Cleft%5BS_%7B2%7DO_%7B8%7D%5Cright%5D%5E%7B2-%7D+%5Crightleftharpoons+2+%5Cleft%5BNH_%7B4%7D%5Cright%5D%5E%7B%2B%7D+%2B+%5Cleft%5BS_%7B2%7DO_%7B8%7D%5Cright%5D%5E%7B2-%7D&bg=1a1a1a&fg=f3bf10&s=2&c=20201002)
The counterions just sort of float off and don’t participate in the following etching reaction in any serious way; they just busy themselves loosely binding to the persulfate ions and falling back off in a constant dance of equilibrium. The real action is with the persulfates, which are ready to get to work on metallic copper.
Unlike with ferric chloride, the overall reaction between persulfates and copper is pretty much the whole story:
![\bf Cu_{(solid)} + \left[S_{2}O_{8}\right]^{2-} \rightarrow Cu^{2+} + 2 \left[SO_{4}\right]^{2-}](https://s0.wp.com/latex.php?latex=%5Cbf+Cu_%7B%28solid%29%7D+%2B+%5Cleft%5BS_%7B2%7DO_%7B8%7D%5Cright%5D%5E%7B2-%7D+%5Crightarrow+Cu%5E%7B2%2B%7D+%2B+2+%5Cleft%5BSO_%7B4%7D%5Cright%5D%5E%7B2-%7D&bg=1a1a1a&fg=f3bf10&s=2&c=20201002)
When the persulfate ions come in contact with solid copper, the metal eagerly donates electrons to the peroxide bond, reducing the bond and splitting the persulfate into two sulfate ions while solubilizing the copper. The dissolved copper then binds to one of the sulfate ions to make copper (II) sulfate, which lends the persulfate etchant solution a familiar blue-green tinge as etching proceeds.
Cupric Chloride
Another etchant popular with homebrewers and commercial manufacturers alike is cupric chloride, or using the currently accepted nomenclature, copper (II) chloride. It might seem a little weird that an etchant for copper would contain copper itself, but cupric chloride etches quickly and cheaply, and has the benefit of regeneration.
While it’s possible to just buy (or make) a cupric chloride solution by treating scrap copper with hydrochloric acid, it’s easier to just throw all the ingredients together with the PCB to be etched and let the copper on the board stand in for the scrap copper. The overall reaction is pretty simple, but again, it hides some interesting chemical complexity:

Cupric chloride attacks the metallic copper on the PCB, producing two molecules of soluble cuprous chloride in the process. Pretty simple, but where does the cupric chloride come from in the first place? We need a way to dissolve a little bit of copper from the board and get it to react with some chloride ions. This is commonly done with a mixture of hydrochloric acid and hydrogen peroxide. First, the hydrogen peroxide decomposes into water and an oxygen radical, while the hydrochloric acid dissociates into hydrogen and chloride ions:


This is a pretty potent mix, with the oxygen radical and the chloride ions attacking the solid copper metal and forming a complex known as tetrachlorocuprate:
![\bf O\cdot + 2 H^{+} + Cu_{(solid)} + 4 Cl^{-}\rightarrow H_{2}O + \left[CuCl_{4}\right]^{2-}](https://s0.wp.com/latex.php?latex=%5Cbf+O%5Ccdot+%2B+2+H%5E%7B%2B%7D+%2B+Cu_%7B%28solid%29%7D+%2B+4+Cl%5E%7B-%7D%5Crightarrow+H_%7B2%7DO+%2B+%5Cleft%5BCuCl_%7B4%7D%5Cright%5D%5E%7B2-%7D&bg=1a1a1a&fg=f3bf10&s=2&c=20201002)
The chlorine-copper complex is capable of directly oxidizing copper, which creates the cupric chloride that will then go on and do the bulk of the etching:
![\bf \left[CuCl_{4}\right]^{2-} + Cu_{(solid)} \rightarrow 2CuCl_{2}](https://s0.wp.com/latex.php?latex=%5Cbf+%5Cleft%5BCuCl_%7B4%7D%5Cright%5D%5E%7B2-%7D+%2B+Cu_%7B%28solid%29%7D+%5Crightarrow+2CuCl_%7B2%7D&bg=1a1a1a&fg=f3bf10&s=2&c=20201002)
The key advantage of cupric chloride etching is regeneration, which can be accomplished in a number of ways. Industrially, chlorine gas is often bubbled through the etchant; this changes the cuprous chloride back into cupric chloride without diluting the etchant, but is obviously not something that you’d want to do in the home lab. Sodium perchlorate, another strong oxidizing agent, is sometimes used industrially, but has the disadvantage of generating a sodium chloride precipitate to the etchant which needs to be removed. There are also electrolytic and electroosmotic methods that restore the cupric chloride while also recovering the metallic copper, but those are obviously complicated.
Luckily, the home gamer has a simple regeneration method available, one that uses chemicals that we’ve already added to get the reaction started: hydrochloric acid and peroxide:

Oxidizing cuprous chloride with hydrogen peroxide in the presence of chloride ions from hydrochloric acid effectively resets the etching solution, restoring the cupric chloride and making the solution ready for another go at the solid copper metal. This does produce water molecules, though, so dilution is a problem, but that can be compensated for to some degree by adding more acid. Still, it’s a pretty neat system, a nearly closed-loop process that’s cheap and simple.
There are obviously a lot of details missing from this quick tour, and there are a ton of other etching methods I haven’t covered. But whichever one you choose to use, make sure you take the proper precautions, wear your PPE, and have a plan for what you’re going to do with the waste.
from Blog – Hackaday https://ift.tt/j3q0JM1


Comments
Post a Comment