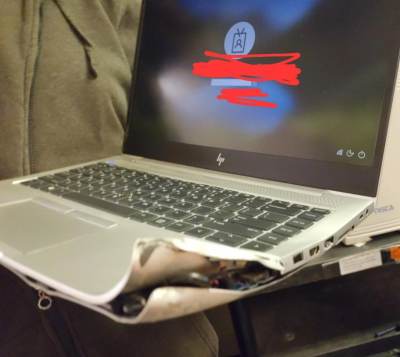
Laptop Motherboard? No, x86 Single-Board Computer!

Sometimes a Raspberry Pi will not cut it – especially nowadays, when the prices are high and the in-stock amounts are low. But if you look in your closet, you might find a decently-specced laptop with a broken screen or faulty hinges. Or perhaps someone you know is looking to get rid of a decent laptop with a shattered case. Electronics recycling or eBay, chances are you can score a laptop with at least some life left in it.
Let’s hack! I’d like to show you how a used laptop motherboard could be the heart of your project, and walk you through some specifics you will want to know.
And what a great deal it could be for your next project! Laptop motherboards can help bring a wide variety of your Linux- and Windows-powered projects to life, in a way that even NUCs and specialized SBCs often can’t do. They’re way cheaper, way more diverse, and basically omnipresent. The CPU can pack a punch, and as a rule PCIe, USB3, and SATA ports are easily accessible with no nonsense like USB-throttled Ethernet ports.
What Makes Laptop Motherboards Cool?
Apart from unparalleled availability all around us, laptop motherboards can help you add a range of cool features to your project, without reinventing the wheel! Want some hardware-accelerated video encoding? The CPU’s integrated GPU is at your service, and if there’s a discrete GPU, it might be just what you’re looking for in a DVR project of yours. Do you want a display attached to your project for your notification or video playback needs? It was born to have a display, just make sure you have a suited cable and a compatible LCD panel – usually, most of them from the same date range. A SATA drive or two, perhaps? A laptop was born to work with those; at least, the not-so-recent ones are.
Do you want battery backup for your project – perhaps, do you want to safety shut everything down when power cuts out? Laptops are meant to do that! If you base your DVR or DIY security system around a laptop motherboard and add the laptop battery to the mix, it can easily last an hour-two when the power goes out, and if you use one as your pick&place machine controller, it won’t lose all job data when someone trips the breakers in your hackerspace.
Are you looking to run some VMs for your home automation, safety, convenience or other purposes? You might go for a $300 multi-core ARM SBC, learning the questionable joys of ARM virtualization and containerization hiccups along the way. Alternatively, you might go for a $50 piece of consumer hardware with a, still, pretty powerful CPU that will flawlessly run all your likely-already-x86 VMs. Hardware-accelerated encryption, for whatever you might need it? Both Intel and AMD will serve you well here.
Oh, and it’s x86 – most software will run on it, and some software runs on x86 exclusively; in such cases, going for a x86 board is a no-brainer. Is a laptop mainboard going to be as low-power as an ARM core? No. Will it be really damn close, with laptops always optimized for low power? Yes! Will it give you less grief in quite a few scenarios? Also yes! Is it widely tested hardware with a trove of software to use? Yes, yes and yes.
Apart from discussing the purpose-tailored aspects, however, there is something seriously fun about taking a piece of technology that’s almost-but-not-quite suitable for your project, and making it fit your needs exactly as you need it. It makes for quite a learning experience, too. Especially if you can access schematics, you get a glimpse into what it takes to design a product fit to reach tens of thousands of people in different circumstances, and a pretty complex product electronics-wise, at that.
Even in cases where the advantage of a laptop board over a Raspberry Pi isn’t clearcut, it makes your project journey bit more remarkable. By now, I build projects based on laptop motherboards as a bit of a hobby – it’s not just a means to an end, but also a lovely way to spend some time, and a bit more noteworthy than using a generic single-board computer for achieving whatever need you’re looking to get fulfilled.
What Can You Build?
You can indeed build a DVR, or a VM server, a general-purpose server with more oomph, or a controller box for that one machine that requires Windows for its software – a pick and place, lasercutter, or a fancy printer with one-of-a-kind software setup requirement. Apart from all the fun aspects that laptop board reuse has, it generally makes sense to use laptop motherboards in projects that take advantage of x86 strengths – and there’s quite a few examples that come to mind.
 For instance, I’ve built a dual display-over-the-network receiver for my workshop needs, with a cheap laptop motherboard from some 2012 laptop, showing datasheets and browser windows on a far away desk where pulling video cables wasn’t practical. Its CPU, while anemic, decodes video streams easily thanks to out-of-the-box hardware acceleration. Its Ethernet connection is gigabit by default, backed by a decent PCIe link instead of a USB bottleneck – throughput isn’t a problem. Given the dual video output requirement, I also didn’t have to dedicate a Pi 4 to the task – after all, those are rare beasts nowadays. Best of all, of course, was that I only spent $20 on the components.
Another laptop board now serves as my backup processing server. It came out of a fancy laptop with four SATA drives, and plenty of PCIe exposed – great for backing up my NVMe drives. There’s no network connection – a backup handling server is best off without it; I did, however, replace its SATA plugs with sockets so that I could wire them up to some cheap 3.5″ drives. Nowadays, I boot it up once in a while, run a time-consuming backup or compression/encryption job, and comfortably leave it for a while until it finishes processing – this way, if I need to backup or encrypt something, I don’t need to leave my main laptop tethered to a HDD.
Buyer’s Guide
You typically won’t need to look out for much if you’re getting the board as part of a broken-case laptop. However, if you’ve found a bare motherboard deal, you’ll want to know some things. First off, don’t buy boards that come without a heatsink, unless you can get one on the cheap separately. The CPU / GPU / chipset heatsinks are custom-tailored for each board out there, and unless you want to spend a ton of time figuring a cooling solution for the bare chip, I advise you not to bother. Also make sure you receive the necessary daughterboards, especially if the daughterboard looks crucial for functioning: like it has the power switch, CMOS battery, or project-required ports. For the first two, schematics might help, but of course, won’t always be sufficient.

It also helps if you can find schematics for your board online. You can usually simply look them up in your search engine of choice. This can get you into a legal grey zone, though, because sometimes these copyrighted schematics are being given away without permission. I’ll put it this way – if you ever want to get more out of your board, say, wire a few buttons up to the keyboard connector or tap into a 3.3 V power rail for part of your project, schematics will help you quite a bit.
Laptop chargers are important, too! In essence, they are power supplies – the battery charging is done with a separate chip on your laptop’s mainboard. If your laptop works from 18 V to 20 V, then any 18 V to 20 V charger will work with it; solder wires to the board if you don’t have a matching plug for the socket. If your laptop is from the HP-Dell-Lenovo dark triad and you use a different charger, you will want to spoof the charger power detection – accessible as the third pin on the DC input socket. HP and Lenovo use resistors to ground, and Dell uses 1-wire EEPROM chips, that you can either buy online or spoof with an ATTiny. As usual, higher amperage charger is okay, lower amperage charger is likely not sufficient. With USB-C-powered boards, you shouldn’t have any problems of the sort. I recommend against using 24 V power supplies – components on the power input path, like input capacitors, might only be rated to 25 V.
In general, the more parts that come together with your board, the better; however, working with the bare board itself is also okay. Whichever you pick, plug some RAM in, and let’s get going – in the next installment!
from Blog – Hackaday https://ift.tt/X7SVxPJ


Comments
Post a Comment